IC22S Arduinoized?

VK3ZYZ

Moderator
Staff member
The updated front TinkerCAD link...

And the .stl file so you can 3D print one.
IC22S_FrontV3.jpg

(The booby near the RH button is from a flaw in the glass sheet I print on, not a file fault.)
This front has a couple of push buttons. These are wired as per the updated circuit in post #36.
Detail pictures in the zip file.
Code to follow.
 

Attachments

VK2RK

Active member
NOTE! Not all OLEDs are created equal. The pin-out is not the same across them all so make sure you check the connections!.
I just got trapped myself (again)!
Especially the Vcc and Gnd pins as they can be swapped around
 

VK2RK

Active member
Found a way that does not require the bypass of the Duplex circuit on the 22S
Unfortunately the radio I recently purchased has a faulty divide by N chip "TC5080P"
The manner in which the PLL PCB on the icom is laid out lends itself to splitting the 9 Volt rails feeding the PLL and the Duplex logic sections
Lowering the voltage to 5Volts on the Duplex logic chips makes them compatible with the Arduino 5 V logic.
Looking at the PLL board from the front of the radio the the 9 volt rail feeds the right most 4011 Pin 14, The track is cut here. Using an 78L05 with the output connected to pin 14, the input to the 9 Volt rail and the ground to pin 8 of the left most 4011, a 0.1 mF ceramic cap across the regulator output and the ground. Now the Duplex logic will reliably work with the arduino logic levels.

In the process of fault finding the problem with my PLL I found that the N divider and the rest of the PLL other two chips are happy to run at a lower voltage, the PLL chips are decoupled by a resistor R25 (15 Ohms) by placing a forward biased Red led is series with the resistor lowers the voltage to 7 Volts, in my case it was lower as the 9 volt rail measures 8.6 Volts so it lowered to 6.6 Volts, the PLL was happy at this level, I am sure that this can be further lowered to 5 volts if so required, however at this time it does not seem to be an issue by feeding the divide by N chip with 5 Volt level logic..

My N divider chip has a faulty input and I don't have the 100 KHz steps only when I heat the chip this becomes functional.
New chip coming from the UK (Hard to find, and costly SOB), the positive is that now minimal modification are requires emulating exactly what the original matrix board did and the Duplex +/- are retained and no need to have this implemented in the code.

My thanks to Denys for his code and help in navigating the hard to read diagrams.

Images show work done to tidy work done by others, the tantalum capacitor moved to the underside of the board
Cleaned many overheated solder joints, removed some excess flux.
View attachment 1505View attachment 1506
View attachment 1507View attachment 1508View attachment 1509View attachment 1510
 
Last edited:

VK2RK

Active member
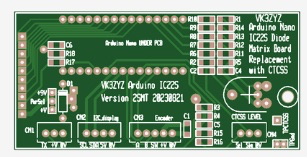
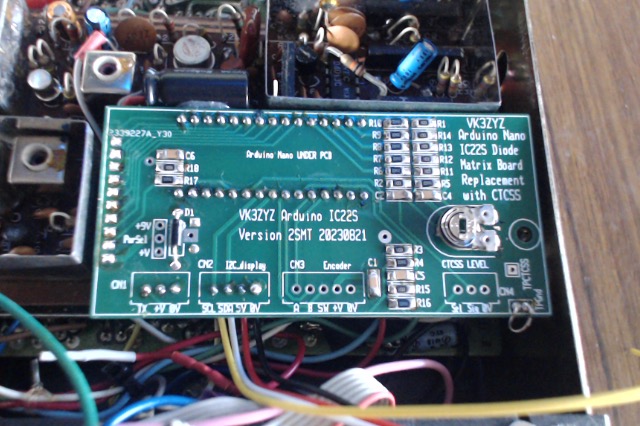
Acknowledging all the hard work done on the IC- 22S by Denys VK3ZYZ however the amount of modifications to the radio done to mitigate the Duplex issues was something that I wanted to overcome to keep all modifications to the radio to a bare minimum, in that the reversal to original form required as little to no work, simply fitting the matrix board and switch would return the radio to original condition.

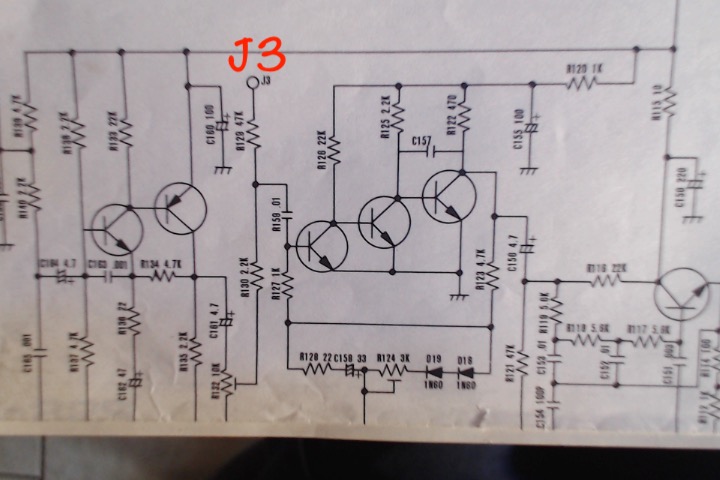
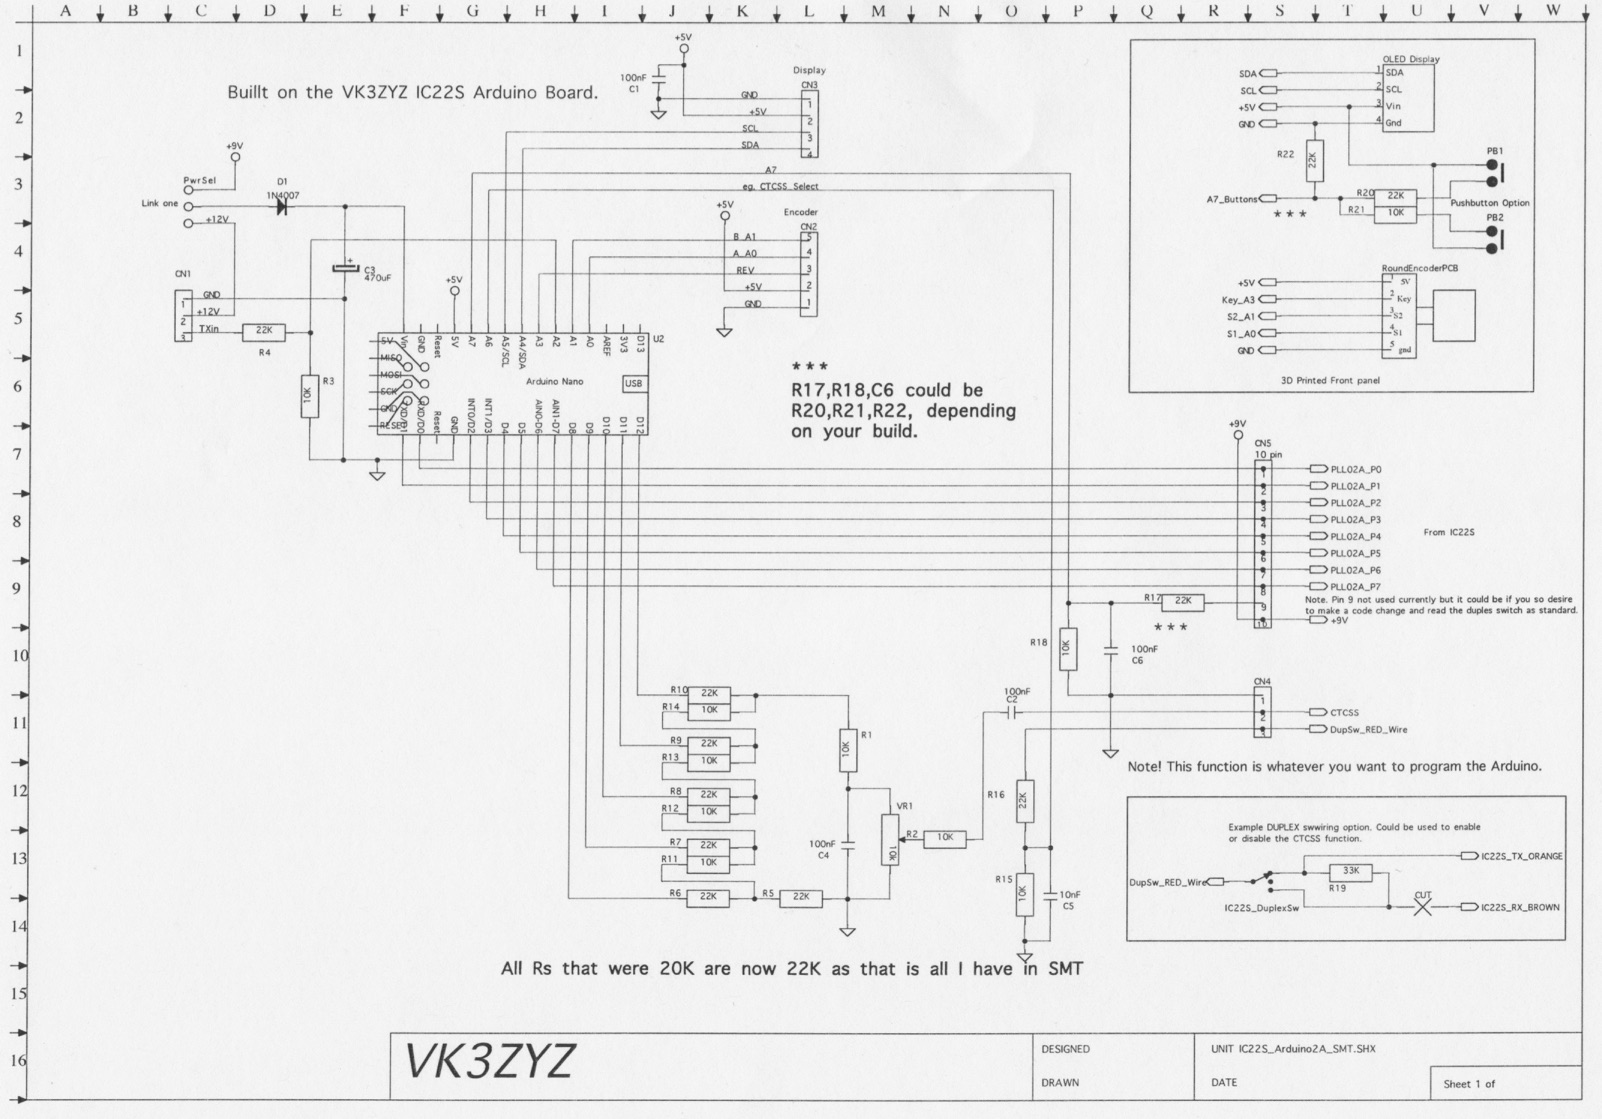
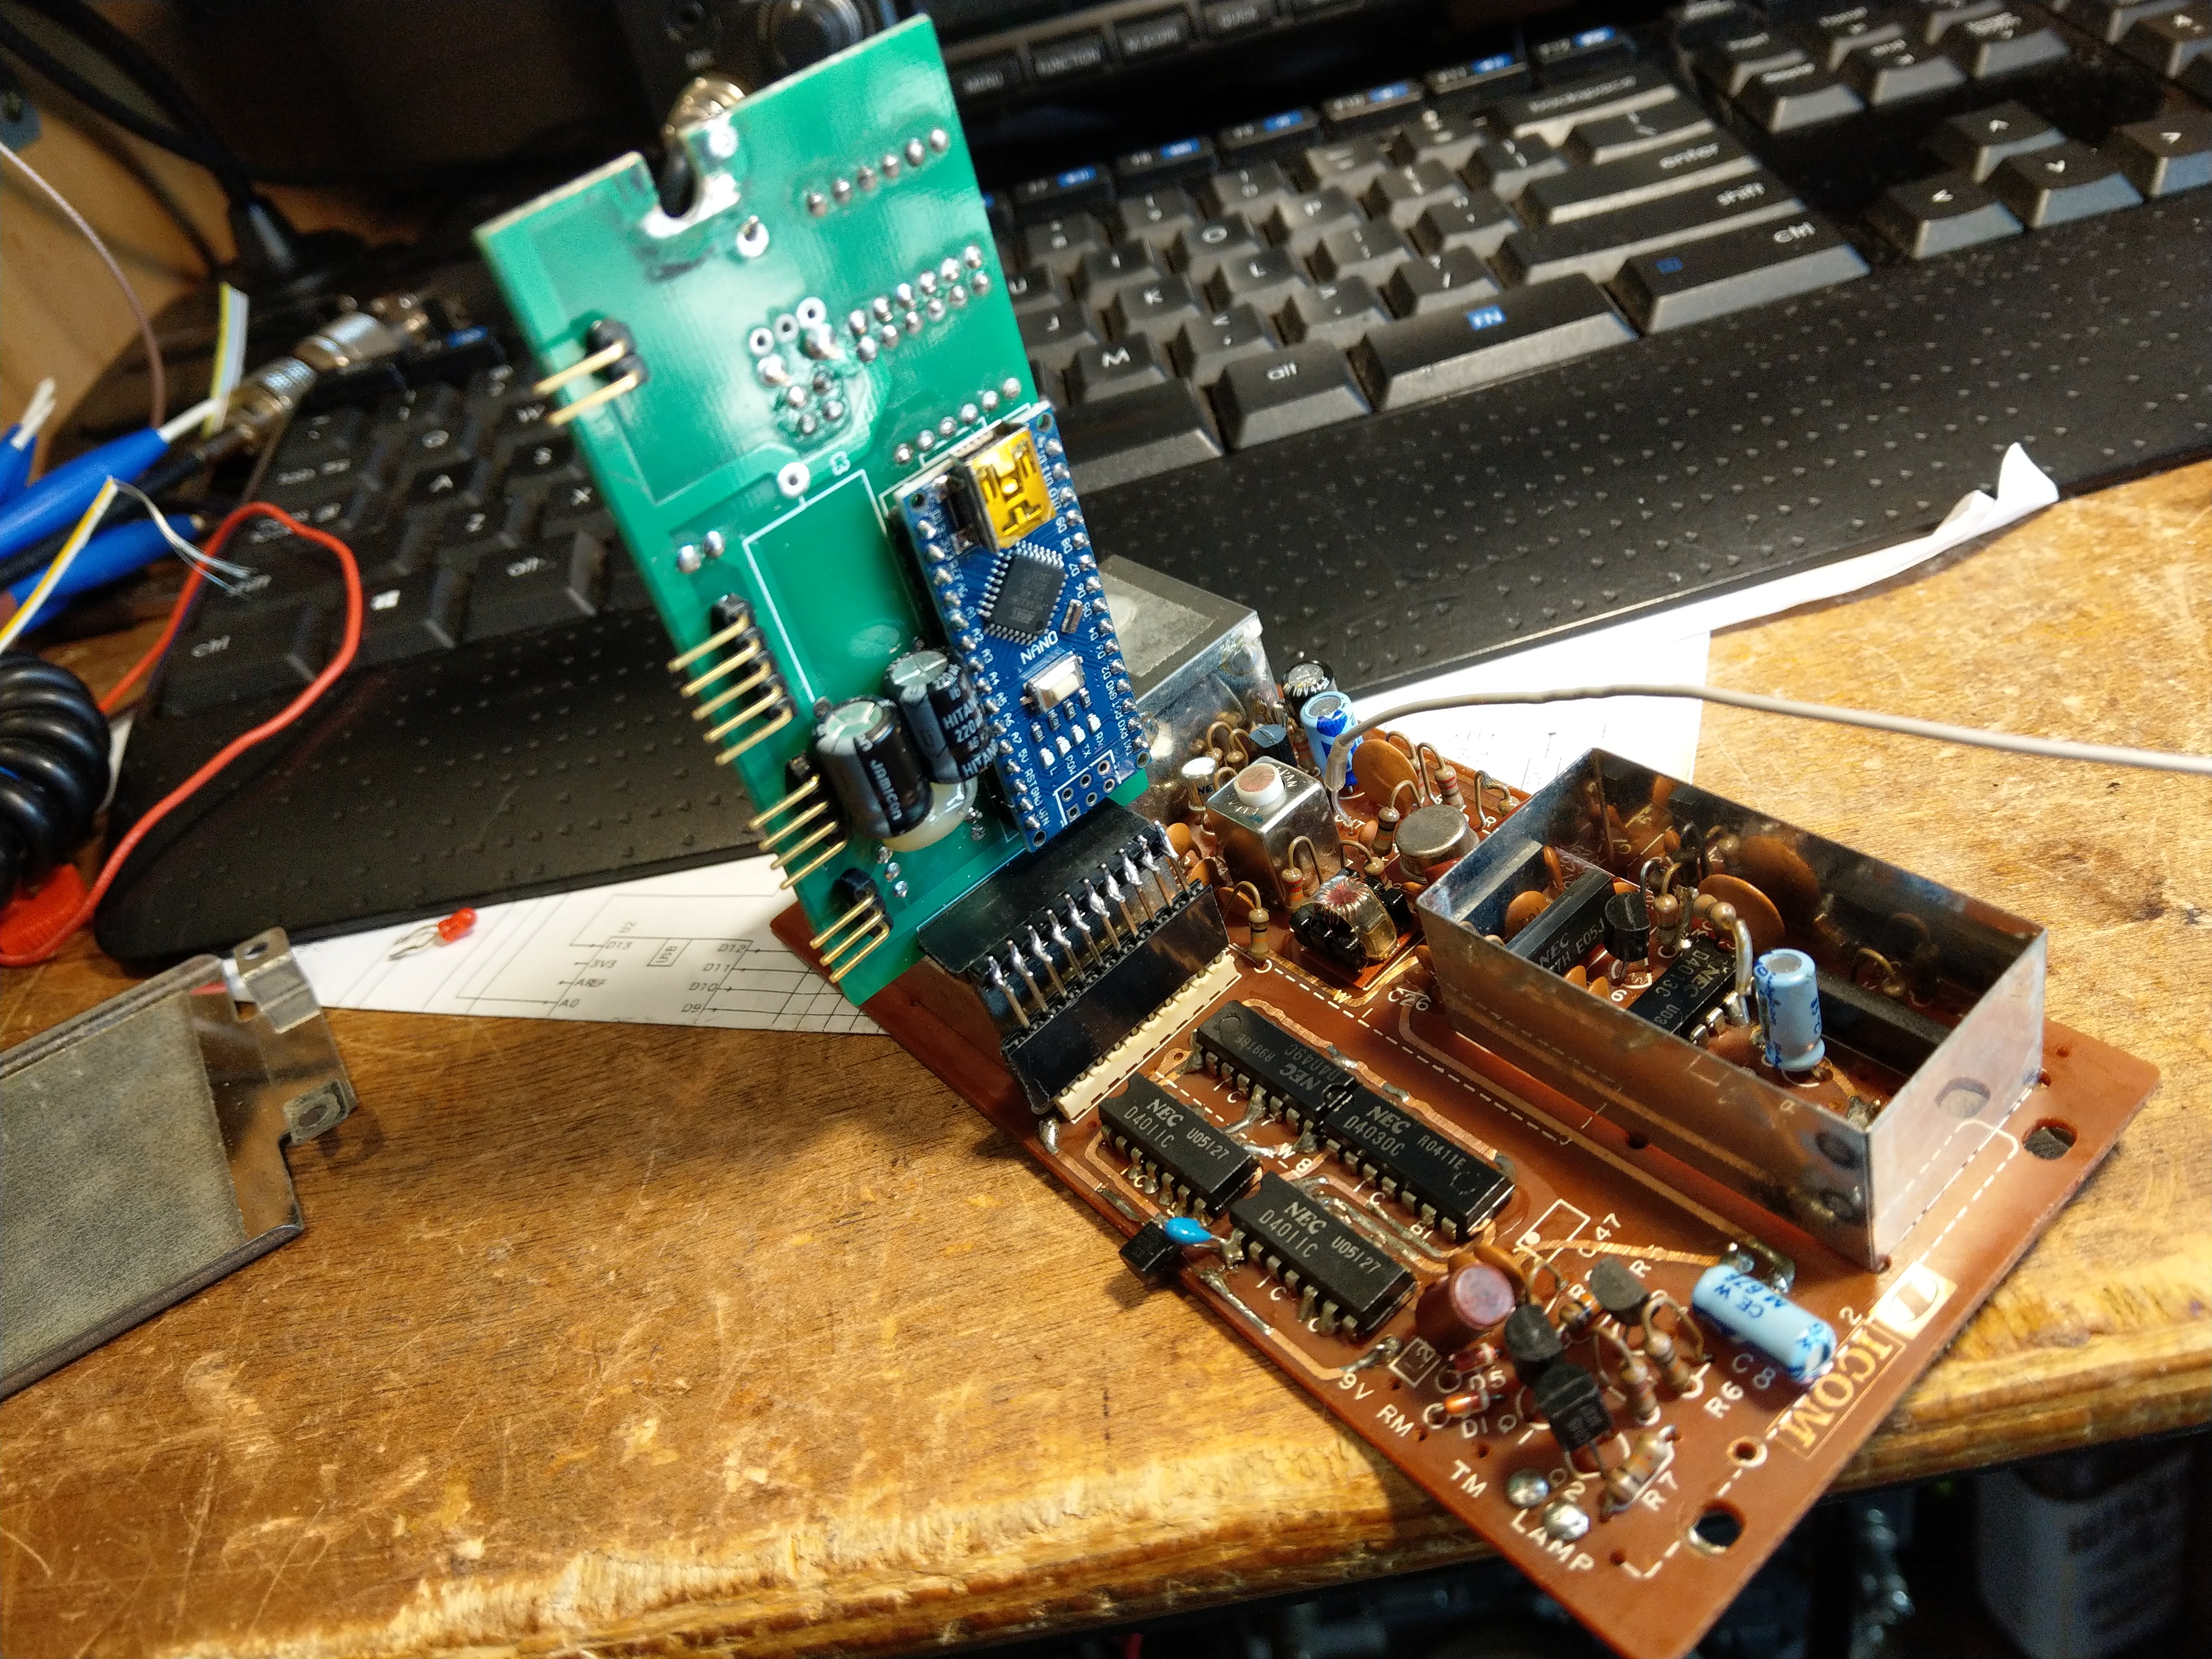
The first challenge was that the Arduino processor works on a 5 Volt logic level, this presented the issue that the radio Duplex logic IC’s run on a 9 volt rail so that the 0 to 5 was not sufficient to cause the circuit to work, fortunately in the manner that the voltage rail to the Duplex logic had been done made it possible to introduce a 5 V regulator to just run the Duplex circuit, now the Arduino could control the Duplex IC’s.
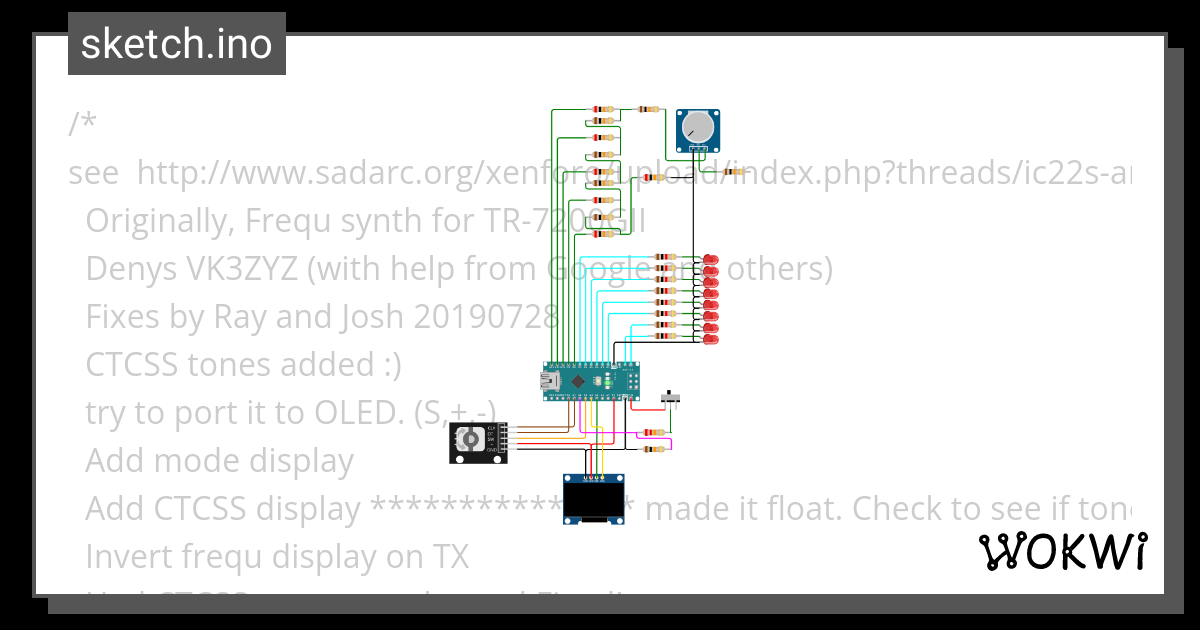
The radio control code was written from scratch but included some of the routines written by Denys namely the Rotary Encoder The CTCSS tone generation routines and some of the OLED Display structures.
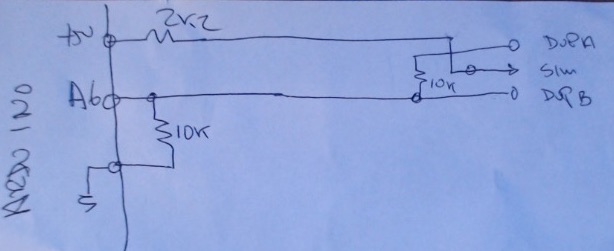
The first issue I was presented with is that one of the Arduino analogue pins is used for the Duplex switch ( A7) and assigned to be a digital pin, normally this is proper however on the Nano pins A6 and A7 are analogue only and not able to be reassigned.

The problem was solved by converting the switch analogue voltages on pin A7 to three logic states.

Duplex switch Voltage values returned in bit form (A/D conversion)

RX Duplex A Count 1023
TX Duplex A Count 12 to 14
Simplex A or B Count 0
RX Duplex B Count 160 to 161
TX Duplex B Count 1023

From the above values the three positions of the switch could be established.
Caveat – As much as I have provided for variations in radios that could have different values the above table it should cater for 99% of units by utilising value limits by testing if the value is between two limits, then the result is true.

The CTCSS code is selected by pushing the encoder knob, this changes the program to use the alternate mode in the void loop ()

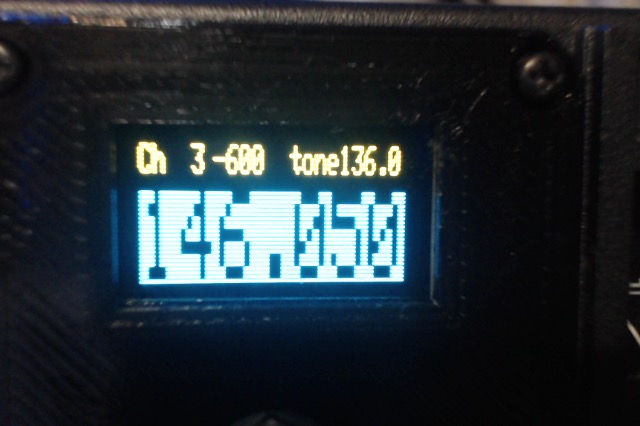
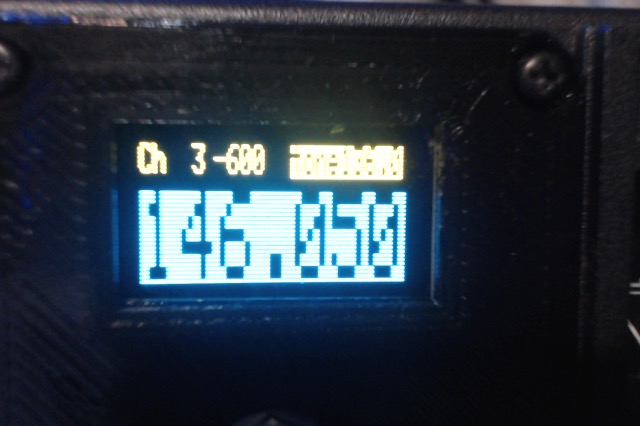
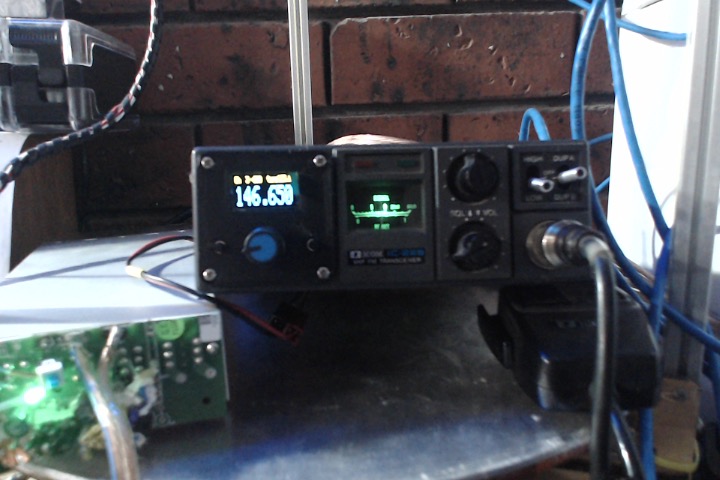
The CTCSS frequency is selected with a push of the encoder knob the “No Tone” indication will appear and the tone is off, turning the encoder knob clockwise selects the required CTCSS, pushing the encoder knob again returns to the frequency mode.

The activation of the Duplex switch will cause the frequency display to show what frequency the radio is receiving on.
The goal to be able to return the radio to stock condition is achieved even if the 5 Volt regulator is left in the radio.

Was a fun project, took many hours and presented several issues to overcome, doing so gave lots of gratification, no such thing as a problem only a solution.

Software releases
V2.2 Beta first release
V2.3 Fixes to CTCSS Logic, CTCSS only in TX mode, CTCSS Transmit only when when in Frequency mode

IMAG4435.jpg
IMAG4434.jpg

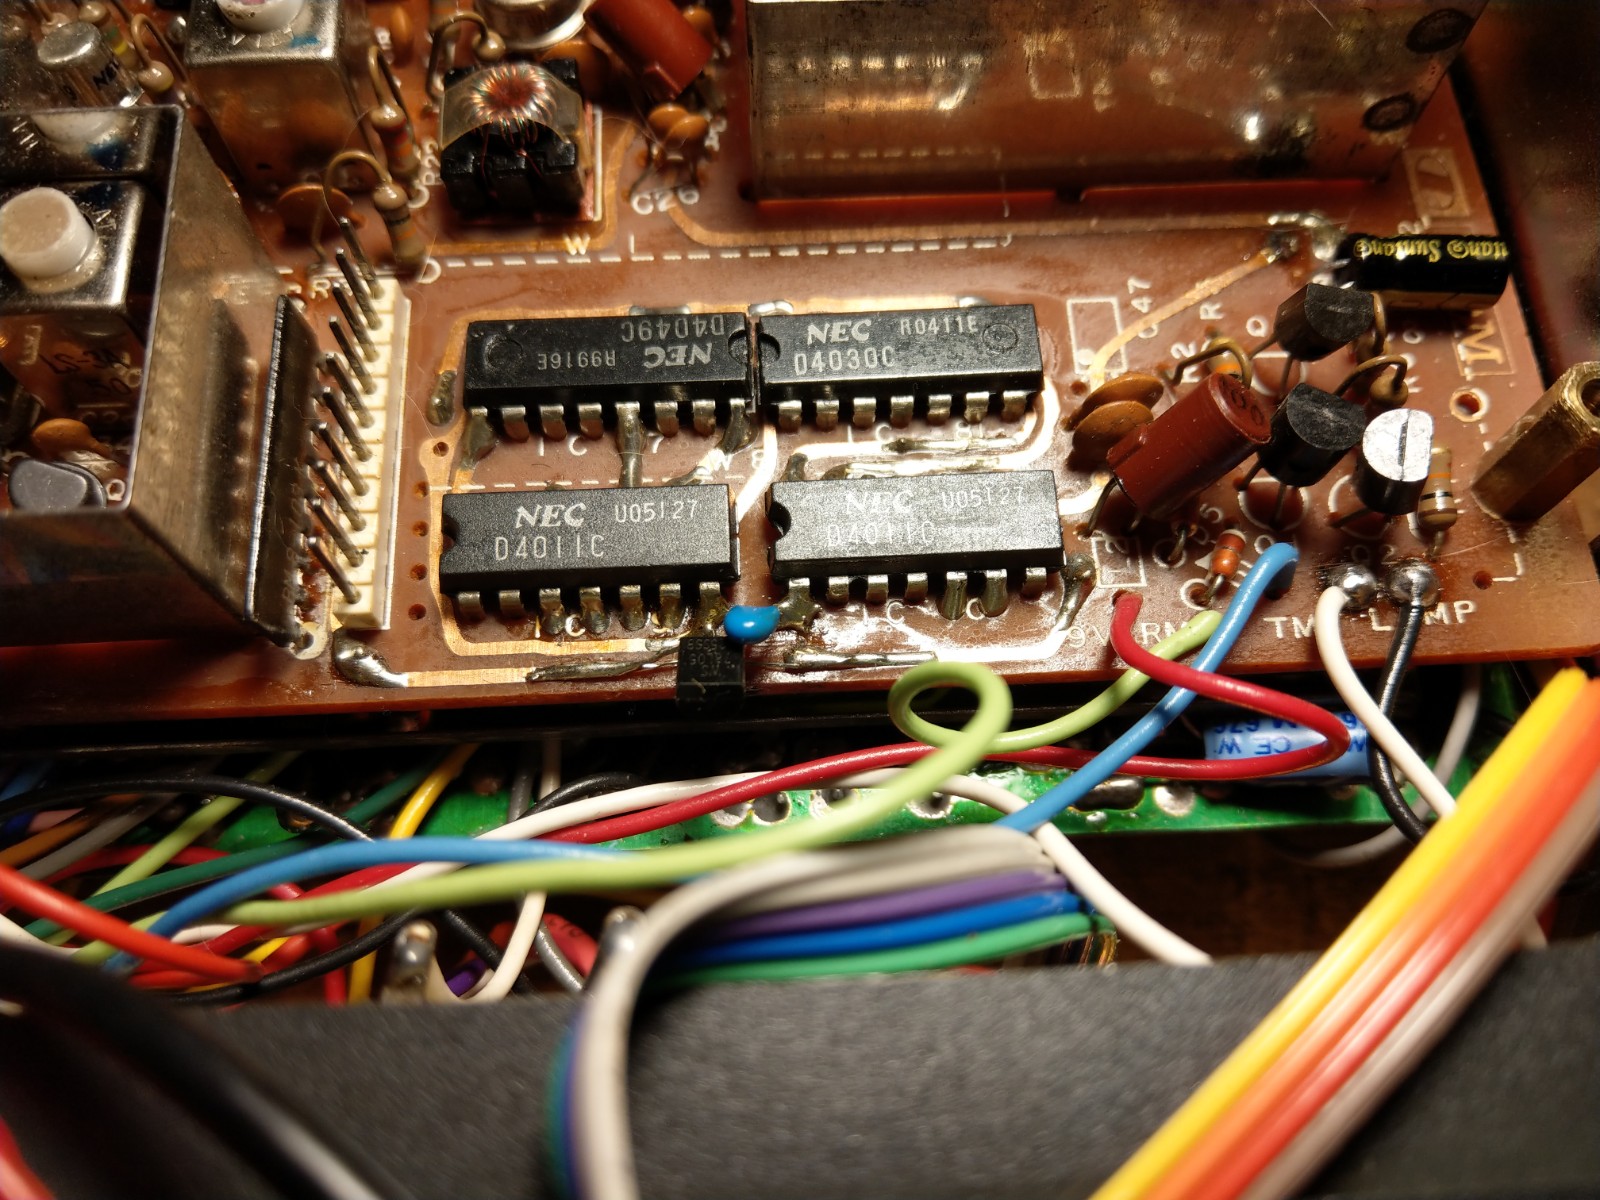
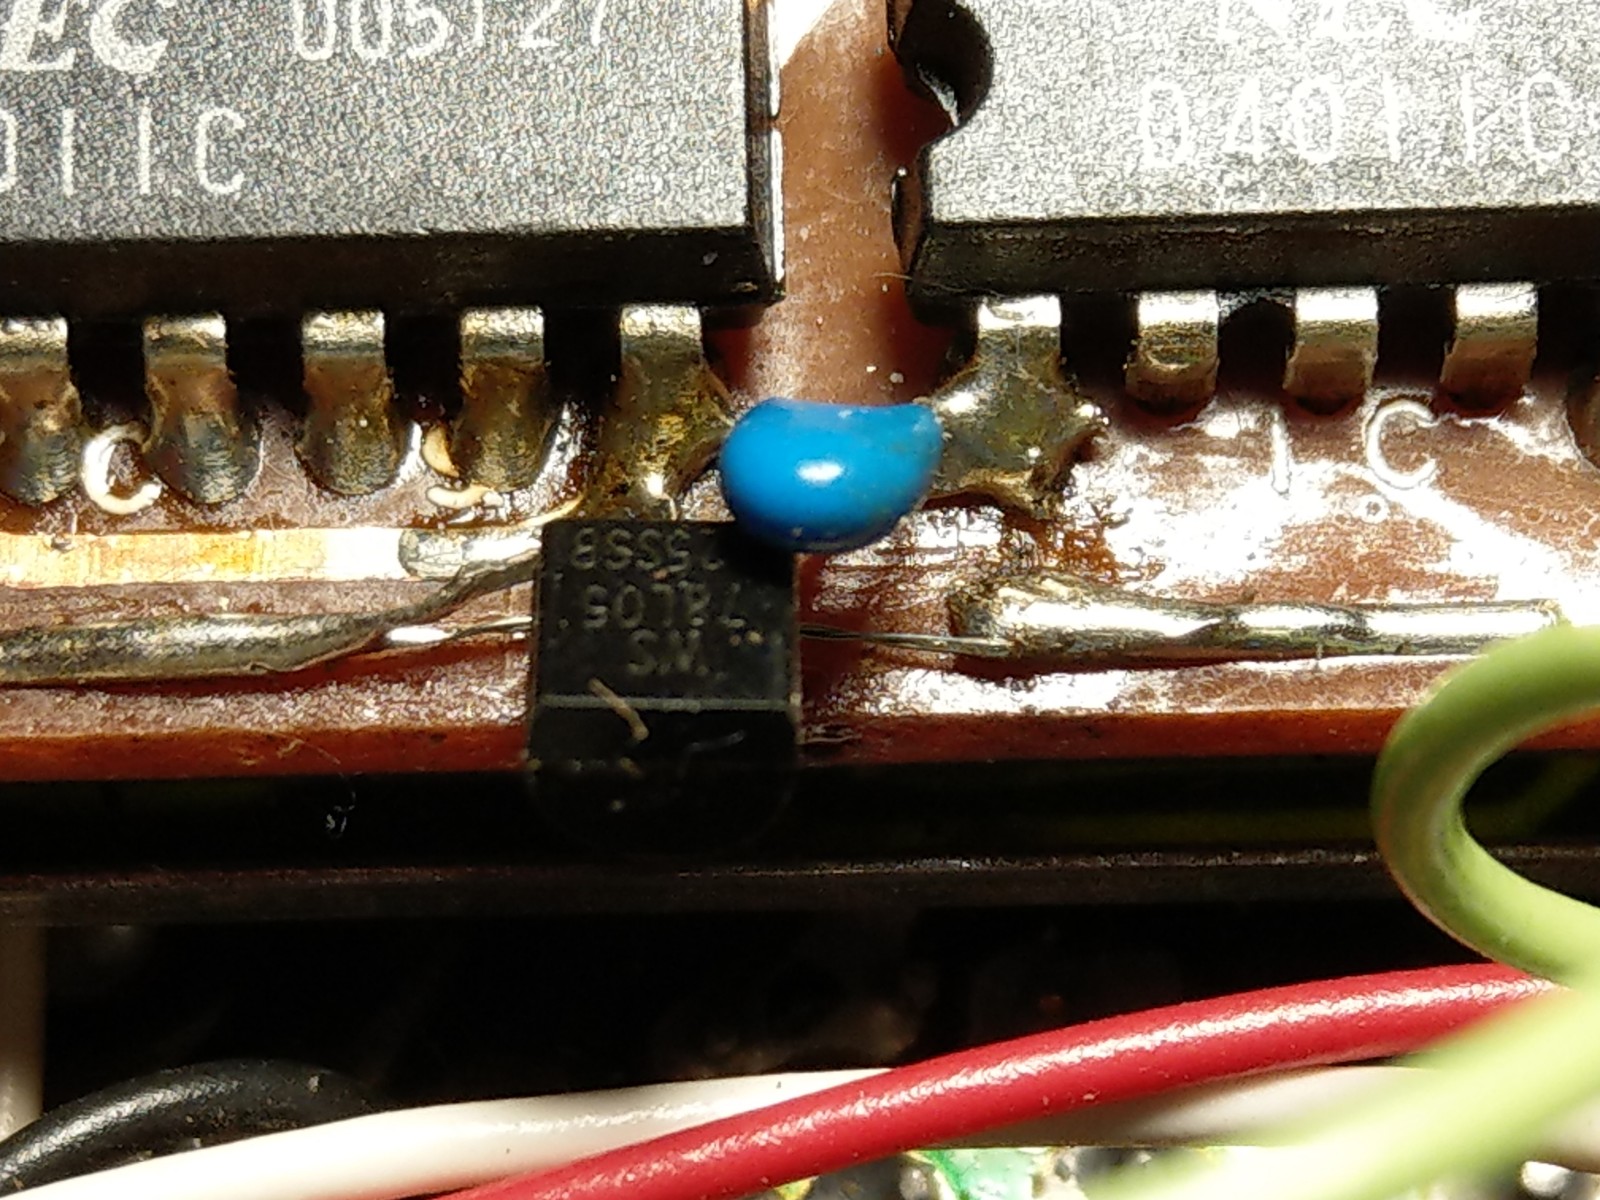
78L05 fitted to the PLL board to make the Logic compatible with the Arduino

Link to videos


Attachments

Last edited:

VK3ZYZ

Moderator
Staff member
The way the connections come out for the encoder having the round PCB and the OLED I have used. Be sure to confirm the OLED display connections as there are a couple of variations.
OLED and Encoder Connections.JPG
 
Last edited:

VK3ZYZ

Moderator
Staff member
I have modded the code yet again :)
Now, the DUP switch is used to select different mode.
The one implemented is to adjust the CTCSS tone for each channel.
Mode_SelectSwitch.jpg

A normal display....
CTCSS_Set.jpg


With the switch in the adjust position, then the encoder can select the CTCSS freq. The CTCSS display is inverted to show it is adjustable.
CTCSS_Adjust.jpg


There is still a bug as occasionally, the display is not inverted but it still changes the CTCSS freq display.
Also, the actual freq does not update until the channel is changed. Those will be fixed but it is a bit late now.

One of the things needing to be fixed is my test setup is in TX mode and the CTCSS will only be settable in RX mod. I'll see about adding a TRX link today so it can be fixed. This is because the IC22S is not powered, just the Arduino.

Min freq is 67Hz....
Photo on 8-3-23 at 10.34 pm.jpg


Max is 254Hz....
Photo on 8-3-23 at 10.34 pm #2.jpg
 
Last edited:

VK3ZYZ

Moderator
Staff member
Photo on 14-3-23 at 7.34 pm.jpg

I finally have an IC22S of my own running :)
This set had no power out but a re-solder the exciter part of the main PCB fixed that.
 
Last edited:

VK3ZYZ

Moderator
Staff member
There will be more mods to come. See...
http://www.sadarc.org/xenforo/uploa...o-for-crystal-replacement.25/page-4#post-1761 post #72.
for explanation.

Here is the IC22S working code so far, adjusting CTCSS and frequency.
You may need to adjust the resistors in the mode switching analog in as this works with what I had in this set, and I cannot recall just what they are.
This IC22S is the one with a couple of push buttons, one on each side of the encoder. The duplex switch is unused.

EDIT: deleted the code as it looks to have been corrupted between programming the IC22S and posting. The radio works (with a few bugs) but the file no longer does. I'm looking into it.
 
Last edited:

VK3YNV

Administrator
Staff member
I doubt it would be a memory leak. Try checking for any array indices going past the end of an array. Maybe print out the indices to the serial port.
 

VK3ZYZ

Moderator
Staff member
The arrays going to far is what I was thinking about. I cannot use the serial port while the code is running as those 2 port pins are used for the PLL data lowest bits.
I was getting confused re the code no longer working (post #51). That comes from trying the code on different hardware! I'd made up a proto test unit for sets like the FM828 and put the IC22S code on it. Well, I forgot the port allocations are different!
Anyhow, here is the code for today. There are a lot of comments to help working out the operation.
We will see if this keeps working.
 

Attachments

VK3ZYZ

Moderator
Staff member
I've just done an upgrade of the IC22S board...
1692585442460.png

It is now mostly surface mount and a couple extra options are included. Namely, a 9V or V+ power selection and the DUP switch now goes to A7 to allow it to be used as is on the set.
 

VK3ZYZ

Moderator
Staff member
A SMT board built with 10K and 22K resistors in the R-2R network has the CTCSS looking ok. (I have no 20K SMT resistors.)
Photo on 24-09-2023 at 6.14 PM.jpg
 

VK3ZYZ

Moderator
Staff member
I have another IC22S with a sus PLL board, so, here is my attempt at removing said board and driving direct from a Nano VFO.
View attachment 2218
The receiver runs fine but the transmitter seems to be taking off. There may have been a fault there already.

I found for the higher frequency range of the Si5351, where the freq is "x 100", it needs to be "x 100ULL"

UPDATE: There is something wrong with the Hi/Low and RX/TX switching I think. The TX buzzes most times and then often stays on at high power (even when switched to low power) when the PTT is released. When I get the enthusiasm again, I'll have another look but for now it is back in its box. The synth goes ok.
 

Attachments

Last edited:

VK3ZYZ

Moderator
Staff member
Here is the surface mount version of the board, not fully completed as I am waiting on some connectors.

Photo on 18-3-24 at 4.11 pm.jpg


One "new" thing I've done is to use the white 10 pin connector from the old diode matrix board so the board fits well now. This connector holes are offset from the pins, unlike the connectors I used before that have the pins and socket holes in line so moving the board a little to the right and hitting the case so it would need to be trimmed and the screw hole files out a bit. I was just a bit to lazy to un-solder the original socket but I wold recommend doing that.

Photo on 18-3-24 at 4.11 pm #2.jpg

Also, as the electro cap is a bit large in diameter, so it hits the ICs on the PLL board, it is hot melt glued to the board edge.
Maybe a fix in the next board version?????

I have been trying to find the frequencies used in USA on the IC22S version there.I believe it is 15Khz channels, not the 25Khz used here in Oz.
Included here is a first run at the code.
Have fun.
 

Attachments

Top